A railroad track consists of steel rails fixed to wooden or concrete sleepers. Duplo track is built from consecutive elements that I will refer to as "rails" for want of a better word, each of which is a single plastic "brick".
There are three basic rail elements: straight, curved and switch (points).
There are other elements such as bridges, road crossings, control rails and crossings, but they are all variants of the straight rail, so I will not discuss those in any detail.
Real versus Duplo
Duplo locomotives and cars do not run on the raised flanges of the Duplo rails, but on the flat parts of the track. The flanges serve to keep the wagons on the rails.
it is much easier for little kids to put the train onto the track correctly
pushing down on the track will not warp it easily
cars and locomotives can have flat wheel rims, allowing them to be used without rails too
the wheels can stand much higher vertical loads
ridges in the surface allow for better traction (more on this later)
there is sufficient play in the linking of rails that kids can lay track easily (more on this later)
In other words: the Duplo track is much more child-proof than a model version of a real track would be. Hats off to the design team!
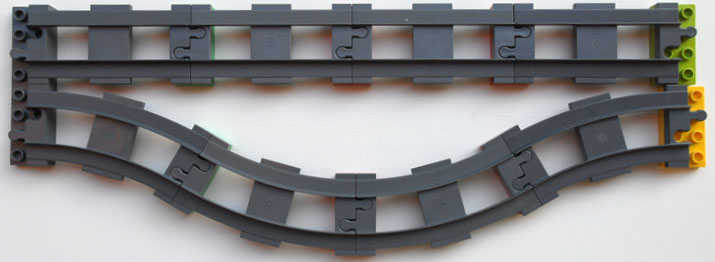
Straight Rails
You never have enough of these! Sets contain a lot of curved rails but only few straight ones. I bought a lot of straight ones second-hand on web sites.
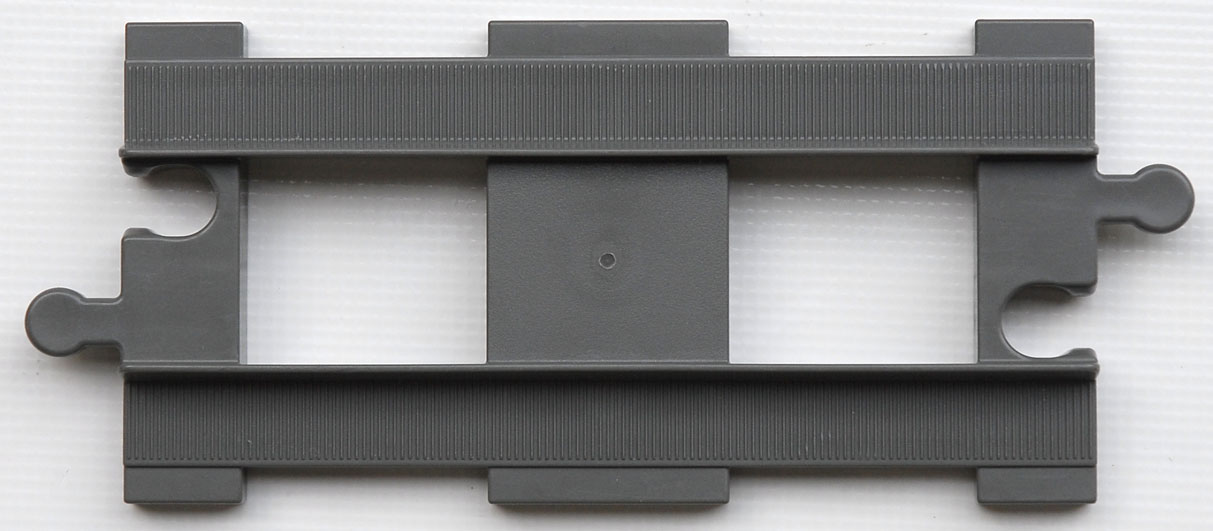
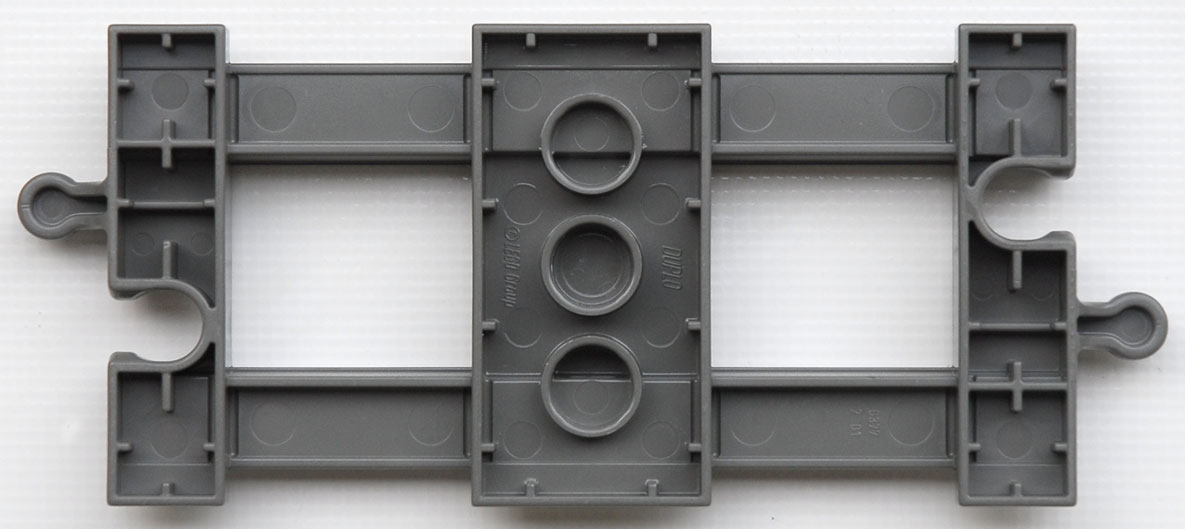
a straight rail, seen from the topa straight rail, seen from the bottom
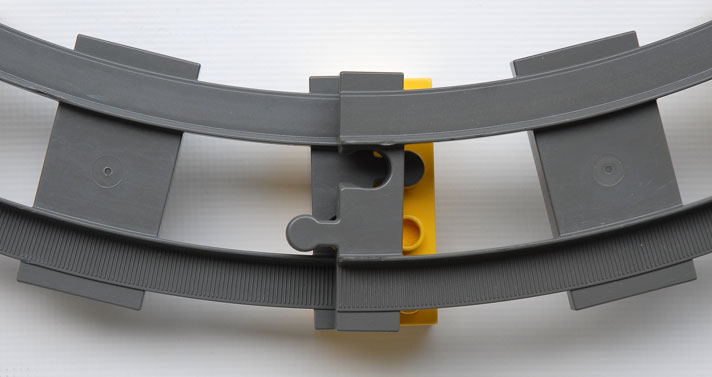
The straight rail is 8×4 measured in Duplo knob distances, with a connection “tab”, similar to those of jigsaw puzzles, sticking out on each side and a corresponding hole next to it.
There are two “sleepers” on that length of track: a full one of 4×2 in the middle and a half one of 1×4 at each end.
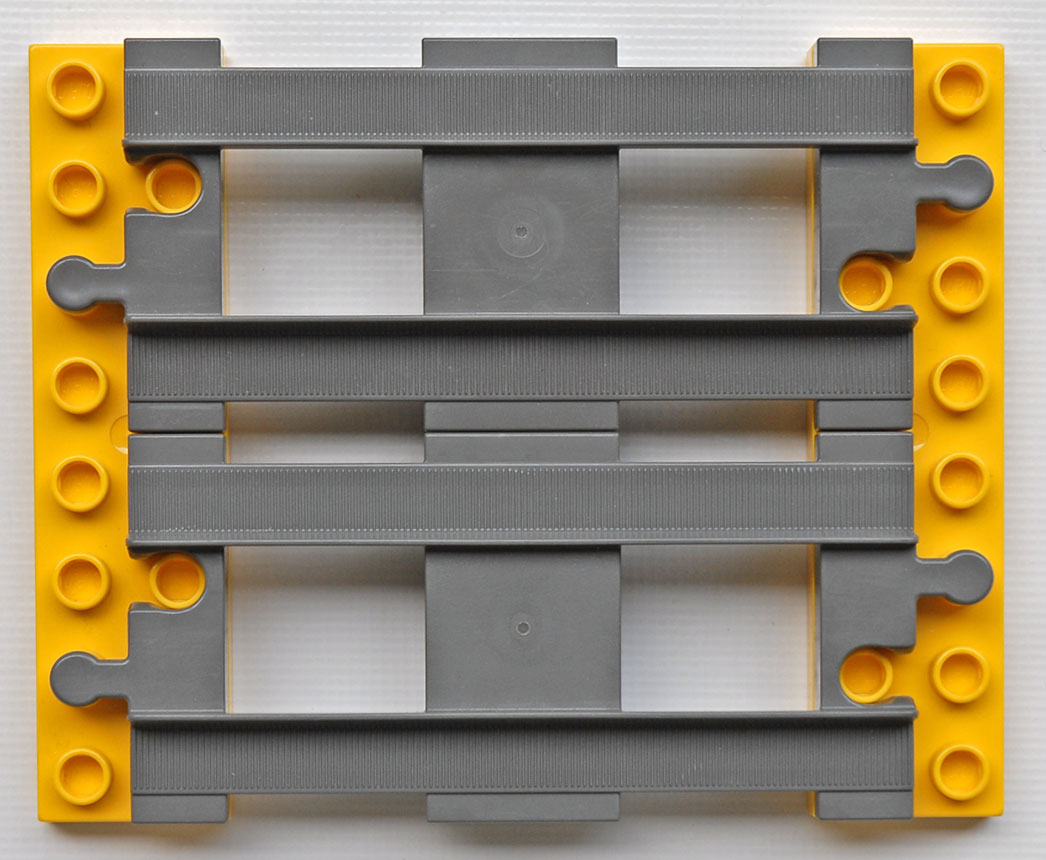
Straight rails fit perfectly on base plates, and also next to each other:
two straight rails, next to each other on plates
As usual with bricks placed next to each other, there is a small gap between the rails.
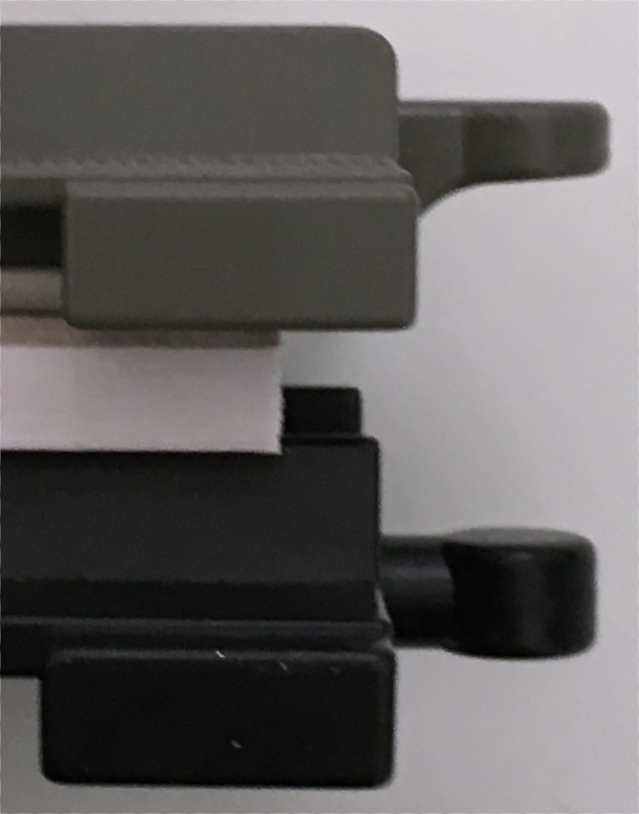
Note that the tabs are shaped so that they are above the knobs on plates. Note also that the tabs of the older, black rails do not fit above the knobs and they do not hold on to bricks:
tabs of old (bottom) and new (top) compared
The old rails cannot easily be used to build slopes or bridges.
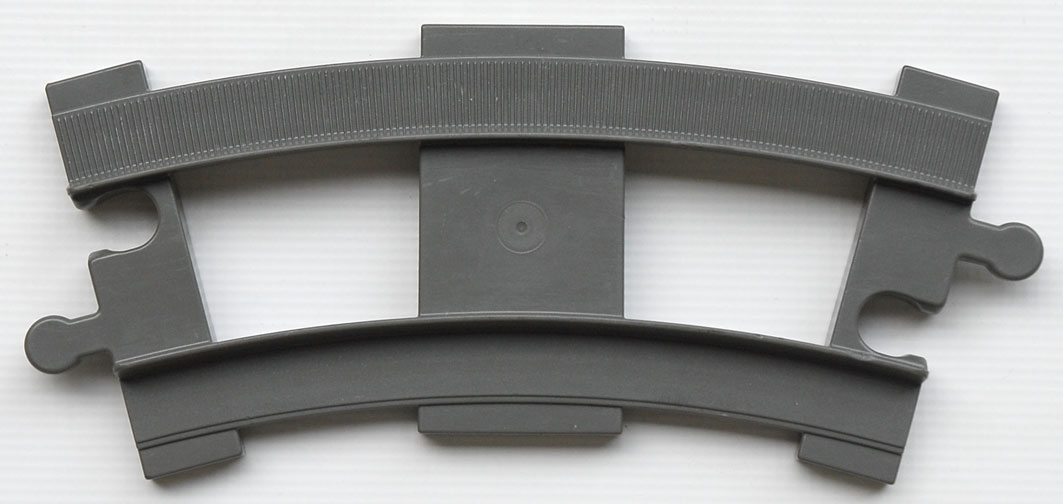
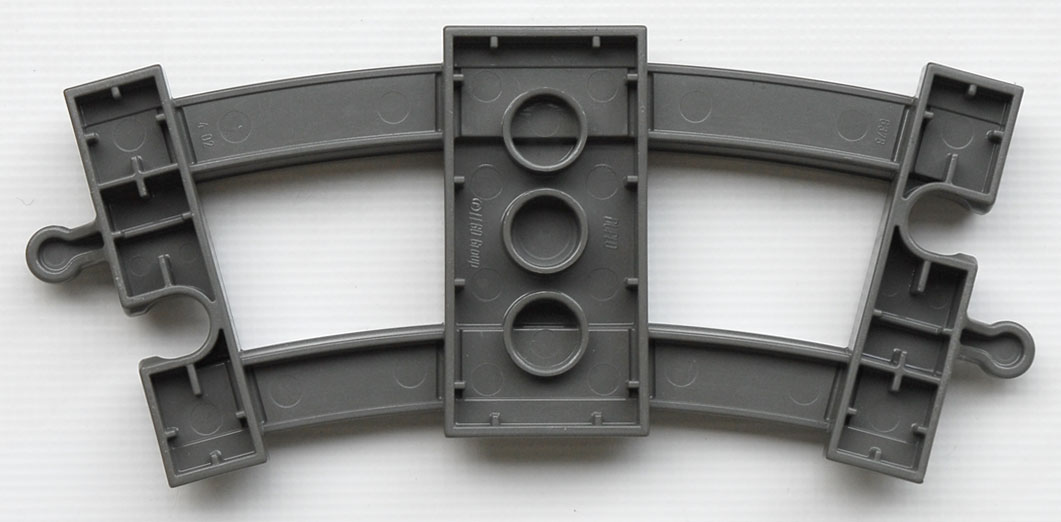
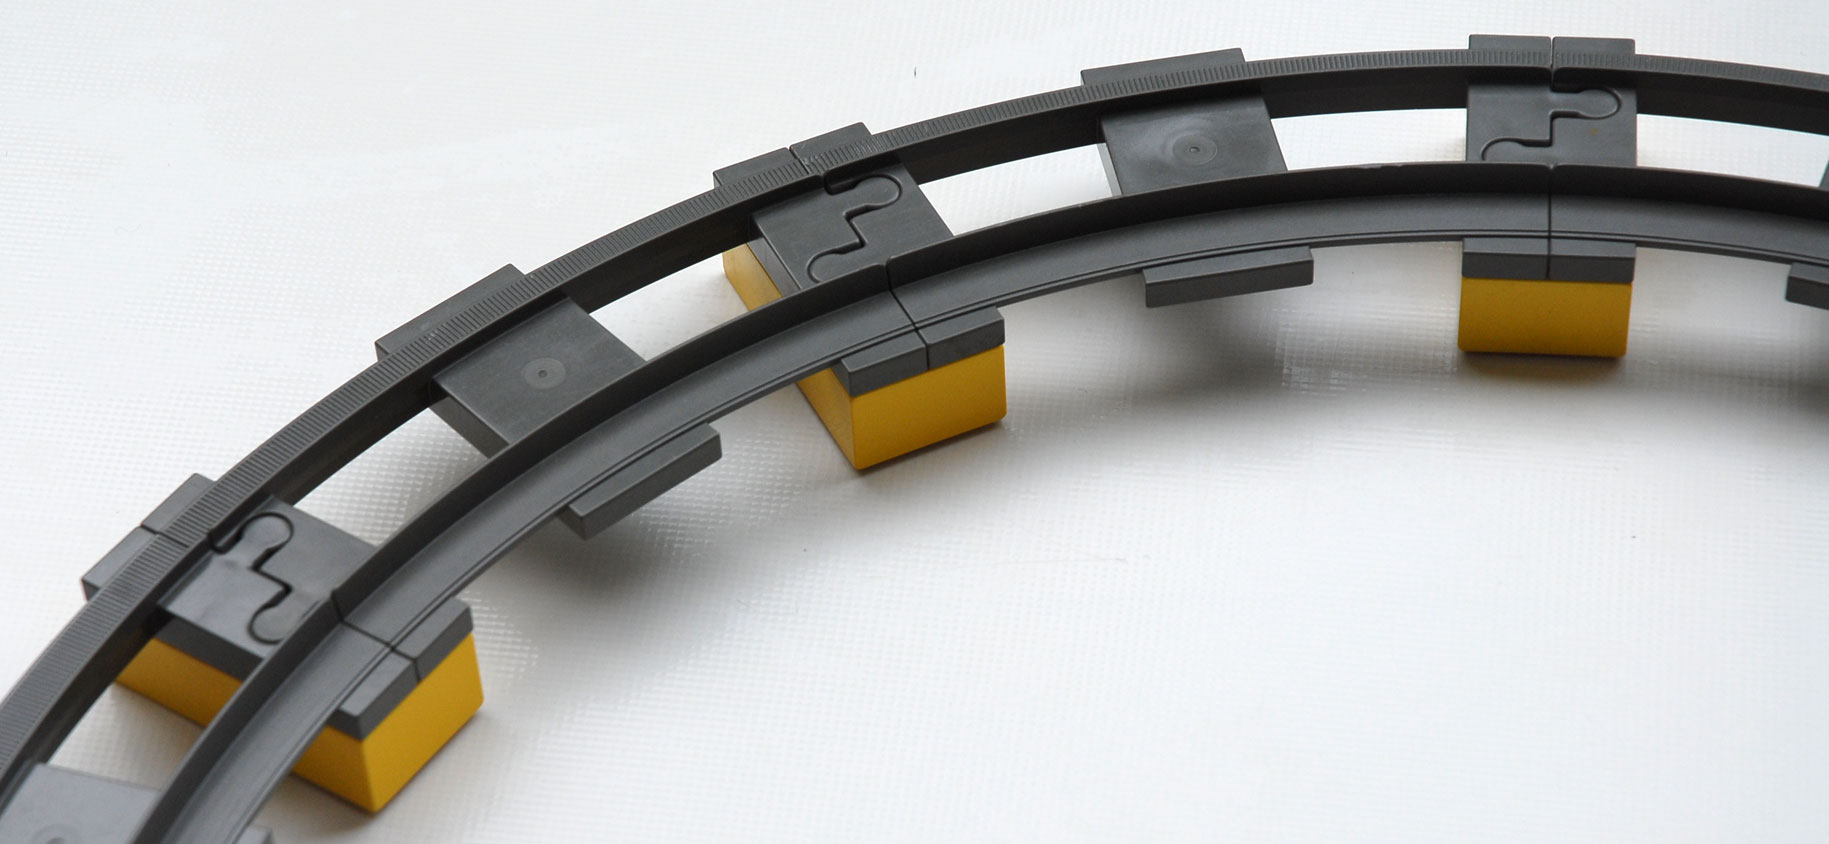
Curved Rails
a curved rail, seen from the topa curved rail, seen from the bottom
There are again two “sleepers”: a full one of 4×2 in the middle and a half one of 1×4 at each end. The sleepers fit perfectly onto 2×4 bricks, but obviously only individually: it is not possible to place a curved rail on a base plate for example.
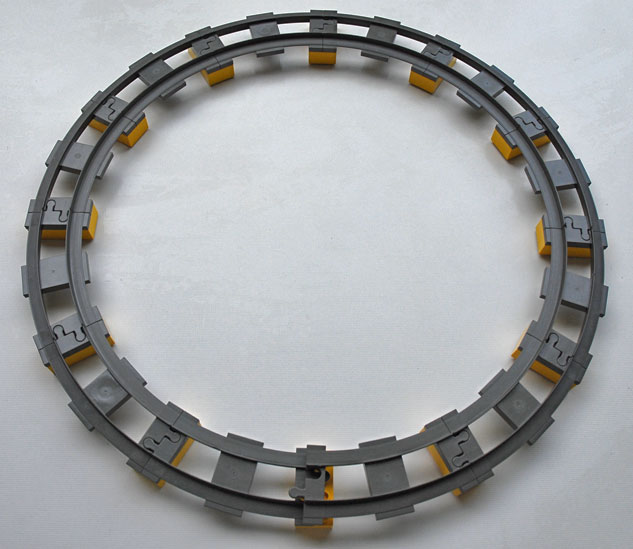
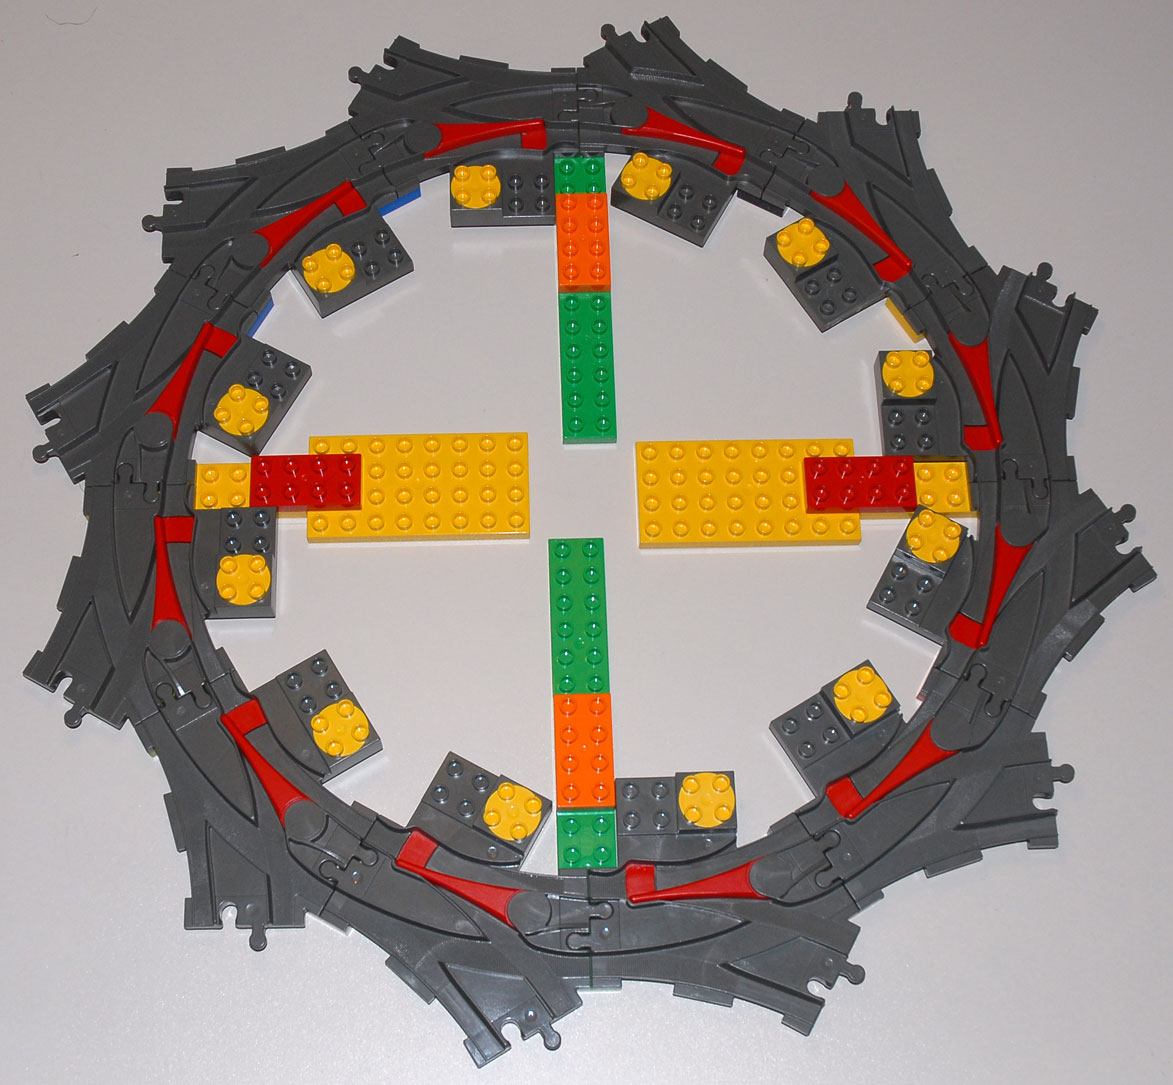
12 curved rails are needed for a complete circle.
The dimensions of a curved rail are somewhat complicated to explain:
I just found out (2013-08-23) from a conversation on the EuroBricks forum (see also later) that there are not two but three types of rails:
type 1: the old, black ones, dividing the circle into 8, and not discussed here;
type 2: the new grey or dark grey type, dividing the circle into 12;
type 3: the newest grey type, which is almost but not quite the same as type 2.
Type 2 Curved Rails:
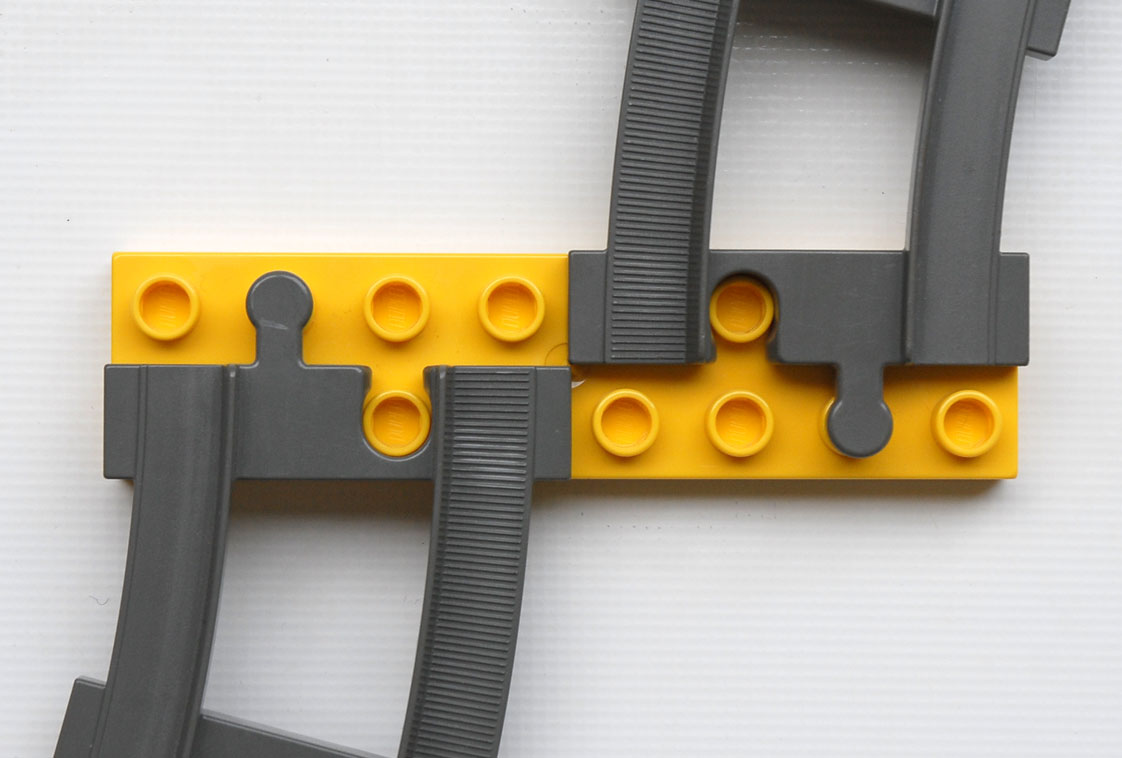
Type 2 curved rails do not fit next to each other:
two curved rails, opposite each othertwo curved rails, side by side
Putting them side by side does not work: the sleepers are slightly too wide! I have no idea why that should be…
Dimensions of Type 2
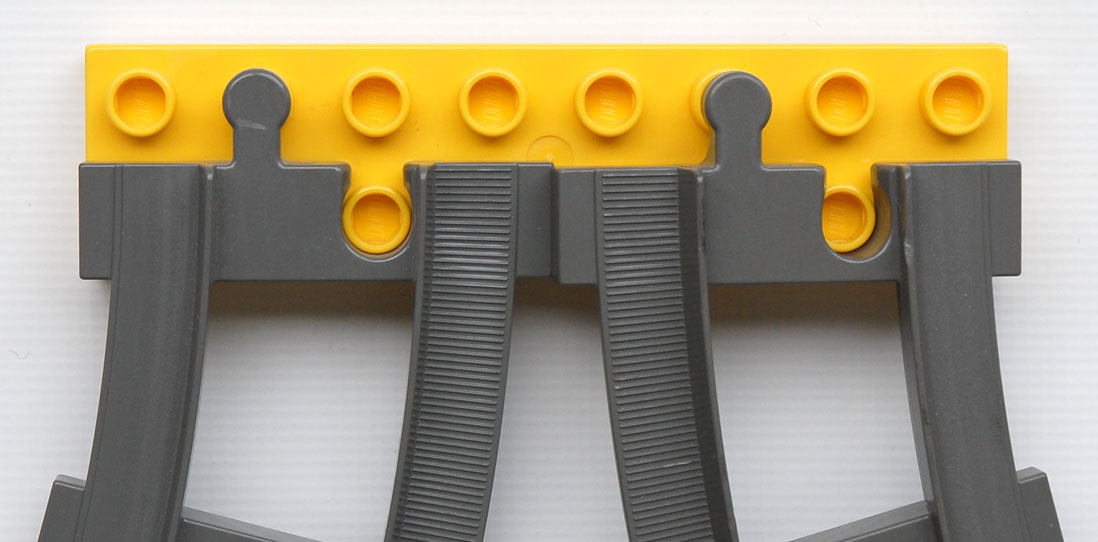
To determine the dimensions of type 2 curved rails I first eliminated the play in the links by putting 2×4 bricks under the half-sleepers. This fixes the distances to a rigourous grid. 12 curved rails are needed to make a circle:
slight warp when fixing sleepers
However, the image shows that there is a consistent small "warp": the bricks touch the surface on the outside of the ring, but are slightly lifted off the surface on the inside. Again I have no clue why this should be…
It is worse than that: the ring does not close:
closure problemclosure problem detail
The curvature seems slightly too high. The difference is not much, and only a small force is needed to close the ring properly.
To determine the diameter of the ring I used plates from opposing sides:
determining the diameter of the ring
It turns out that the diameter is such that it is not possible to make a Duplo construction along it: there is a gap that looks like it is the size of a unit of standard Lego (which is equal to half a Duplo unit).
That makes the outer diameter of the ring equal to 36.5 Duplo units.
I thought that maybe the median length of a curved rail would be the same or close to that of a straight rail. The outer diameter of a full circle is 16×36.5=584mm, the inner diameter is 16×28.5=456mm, and so the diameter of the circle that runs through the centre of the rails is (584+456)/2=520mm. That gives a circumference of π×520=1633.63mm and if we divide that over the 12 rails, then each rail as measured along its centre line is 1633.63/12=136.14mm long. A straight rail though is 16×8=128mm long. The difference is too large.
I think part of the difference comes from the desire to make a simple "eight" which is a basic layout:
the basic figure-eight layout of model railroads [SVG]
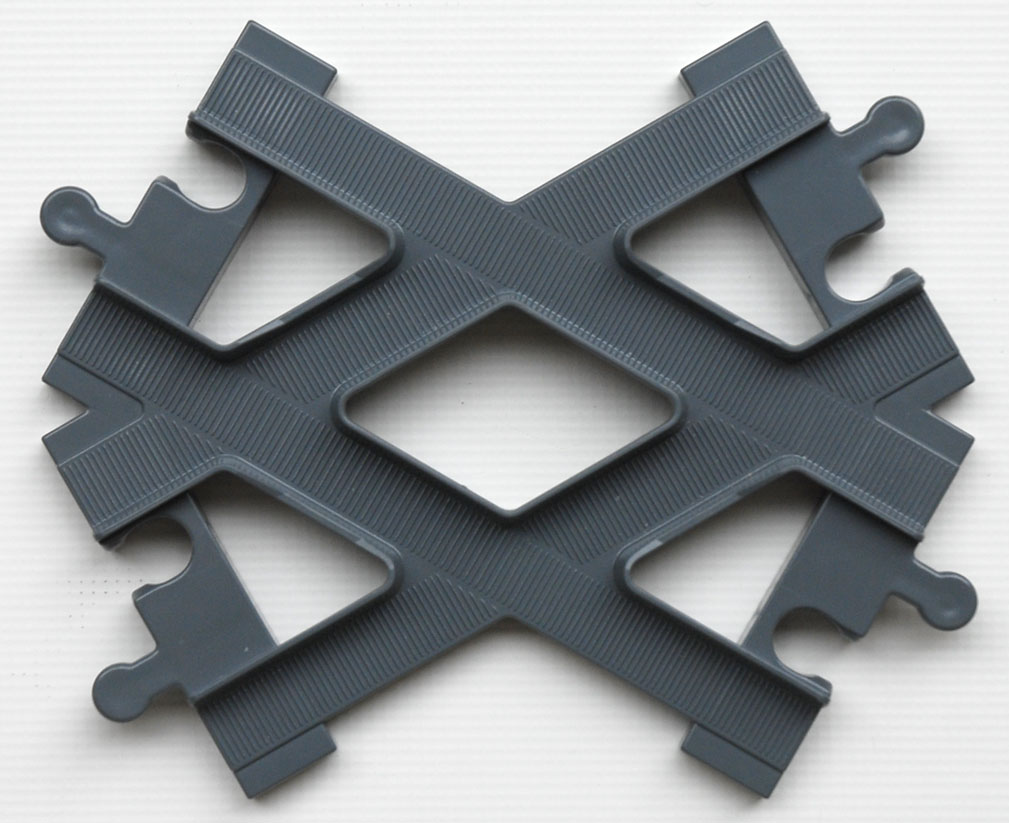
The greyish piece in the middle is a crossing. It is like two straight sections, and has the same lengths as straight rails.
a crossing
The two sections cross at an angle of 30º. But if this is to be integrated into a figure eight, then we need to consider:
Point A is decided by the radius of a rail circle. Point B is at the end of a curved rail needed to get the 30º angle. Point C is 3.5 lengths of a straight rail away from point B. The radius of the circle must be such that C falls on the x-axis. Alternatively, since we know that the radius id 16.25 Duplo units, what is the length k of rail needed to make point C lie on the x-axis?
A little trigonometry shows that:
the coordinates of A are: 0 , 16.25
the coordinates of B are: 16.25⋅cos60º , 16.25⋅sin60º
the coordinates of C are: 16.25⋅cos60º+k⋅cos30º , 16.25⋅sin60º-k⋅sin30º
If the fit were perfect, k would be three whole straight rails plus half of the one in the crossing, i.e. 3×8+4=28 Duplo units. The difference is 16×0.145826mm = 2.33m. If the radius were 16 instead of 16.25 the difference would be -4.6mm which would be more noticeable. But I am not sure that I am onto something at all. Because… If I used plates under the rails to fix the distances and angles, then I would get this:
and quite clearly that is not right either. Fortunately there is enough play that this all does not matter.
More thoughts
Some discussion on the EuroBricks forum led me to another way of measuring the diameter of type 2 curved rails: compare four straight with a "snake" made of four curved.
four straight and four curved
The four curved rails give a section of track that is slightly longer than the four straight ones. Again I used plates to force the alignment, and started at the left on a single long plate to ensure both track sections started exactly at the same point (note that a curved rail can just sit next to a straight one, even if two curved ones cannot). Suppose now that each curved rail spans 30.3 degrees, as we found out they do if we do not force closure of a full ring of 12. I measured the difference between the centres of the plates at the right end. I found an average of 5.8mm difference.
The straight rails cover four lengths, i.e. 4×128mm (straight red line). The curved ones cover four times a different length: Rsinα (the alternating red and blue lines). The straight section is 512mm, the curved one 512mm + 5.8mm = 517.8mm and therefore Rsinα = 517.8/4 = 129.45mm. With α=30.3º, that gives R=256.58mm or a centre diameter of 513.15mm. The width of a sleeper is 4 Duplo units or 64mm (always discounting the small gap for play) so we get an inner radius of 224.58mm and an outer one of 288.58mm, and in Duplo units of 16mm (one knob) that is 14.036 and 18.036 units respectively. The outer radius obtained by forcing the 12-rail circle to close without overlap was 18.25 units.
Note that none of this is important to the kids playing with the rails on the floor: the play in the connections is sufficient to make the straight section the same length as the curved one. Just stretch the straight section a little and compress the curved one a little.
Given that there are more curved rails in any set than straight ones, I would tend to the opinion that replacing a straight section with four curved ones might well have been a major design goal.
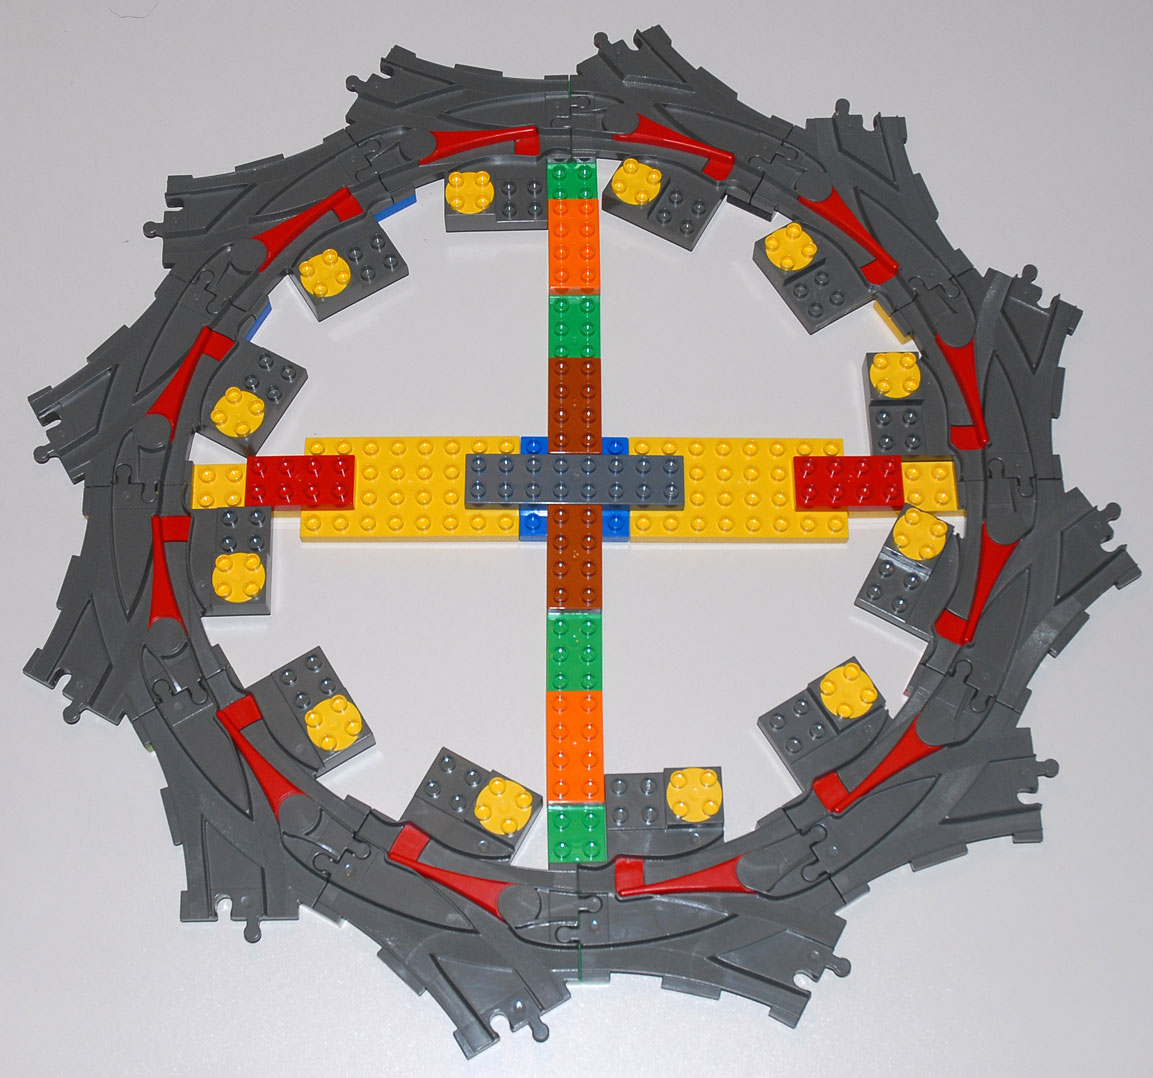
Type 3 Curved Rails
Type 3 is what Lego has been selling since about two years (2011-08, but not for longer, because I bought a set new in a shop about then and it still had type 2 rails). Reading an earlier version of this page, someone pointed out on EuroBricks forum that in a set bought recently (after 2011-08 and before 2013-08) the curved rails actually did fit next to each other, that they formed a circle without overlap and that a snake of four curved exactly matched a section of four straight ones. I.e. they work as expected! Someone at Lego made a correction!
This observation prompted me to go out and buy set 10506. I can confirm that indeed the new type has these properties. They also fit the switches exactly (see another page, to come).
The 10506 set only contains 8 curved rails, so with the two included switches that makes 10 but not 12. I could not make a complete circle, however, completing the circle with two type 1 rails I must observe that there is still an overlap, sufficiently big that it cannot be due only to the two type 1 rails, so further inspection is needed.
Ignoring the possible overlap for now, i.e. assuming that as reported there is none, the outer diameter is now exactly 36 studs (or a mean radius of 16), as expected. Indeed, if four curved are the same length as four straight, and one spans 30º, then Rsin(30º) = 128mm which gives us R = 256mm.
The figure-eight however is now worse, but the difference is still only 1.4mm vertically.
When putting all the connections onto plates, the figure-eight requires almost no forces.
Conclusion
My conjecture for the history is this: after the design mistake of the type 1 black rails, a new design was made with a circle divided into 12. The molds for the straight rails, the switches and the crossing were all right, but those for the curved rails were off by some factor. The small mistake was perhaps only discovered after thousands of curved rails had been produced and perhaps even sold. Molds are very expensive, and because the mistake is only noticed by some strange people like me, production with these slightly off molds was continued. When the molds were worn out, correct molds were produced. But it's only a conjecture.
Traction
All rails have ridges on their flat parts. These provide the necessary traction for the locomotives. The wheels of locomotives have a plastic tyre that has similar ridges.
The ridges are on both sides of straight rails, but that would not work for curved ones, since both drive wheels are fixed to their axles and the outer one must cover a larger distance than the inner one when going through a curve. One of them has to slip! Curved rails have the ridges only on the outside, which means the speed of a train does not seem to increase as it goes around a bend, in fact it slows down slightly. Unfortunately, traction in bends is not so good since the drive wheels grip only ridges on one side, yet it is in curves that more traction is needed to pull cars.
A curiosity is the asymmetry in the ridges of the crossing. They work, but the way it's done is not intellectually satisfying. :-)
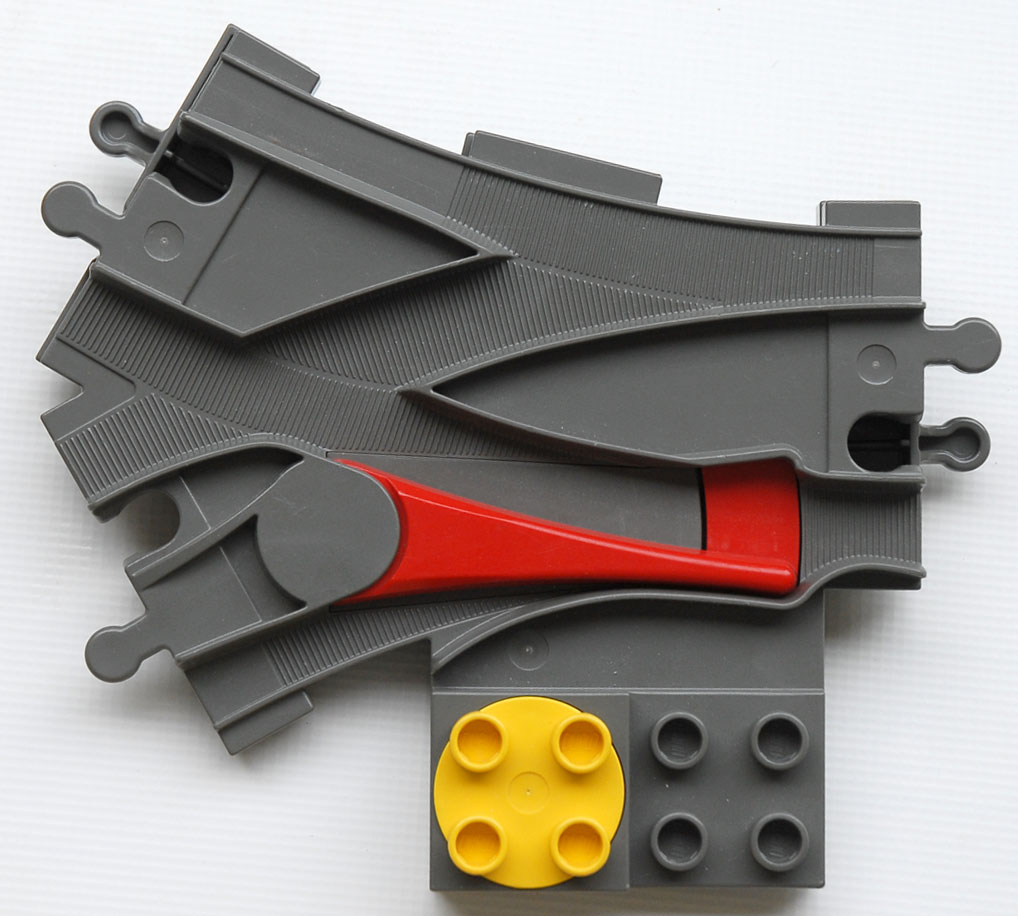
Switches
Switches exist in two types: old and new. The old ones are more sophisticated and have memory, the new ones are much simpler.
an old type switch on top of a type 2 curved rail
A switch is a “meld” of two curved rails, one going to the left, the other to the right. One would expect that therefore a switch can take the place of a curved rail, but as can be seen, the curve does not exactly fit a type 2 curved rail. In fact, it fits exactly the type 3 curved rails, even though the old style switch is much older than the type 3 (and it is this fact that leads me to believe in the conclusion I gave above about the evolution of the curved rails).
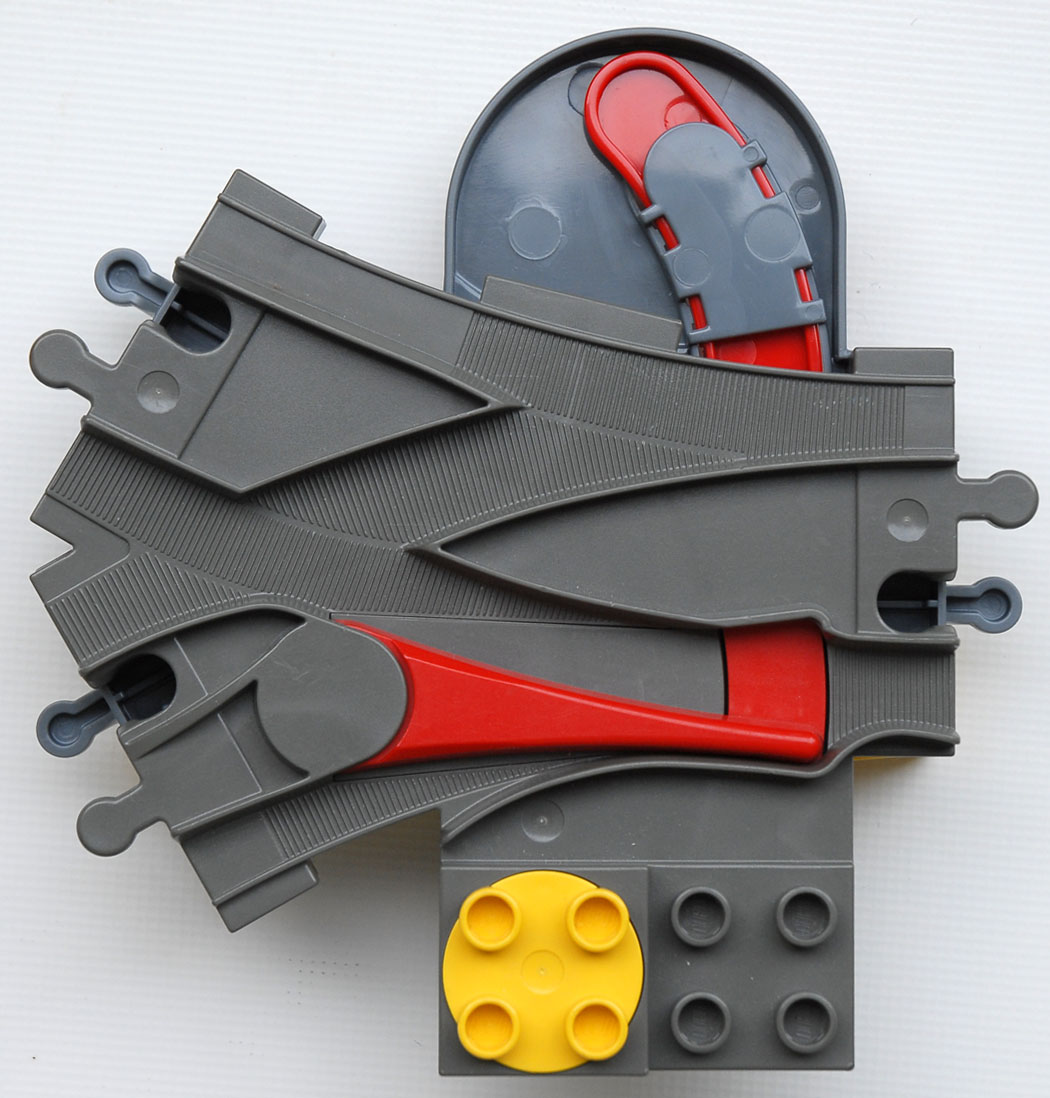
an old type switch on top of a new type switch.
The old siwtches have two springs inside:
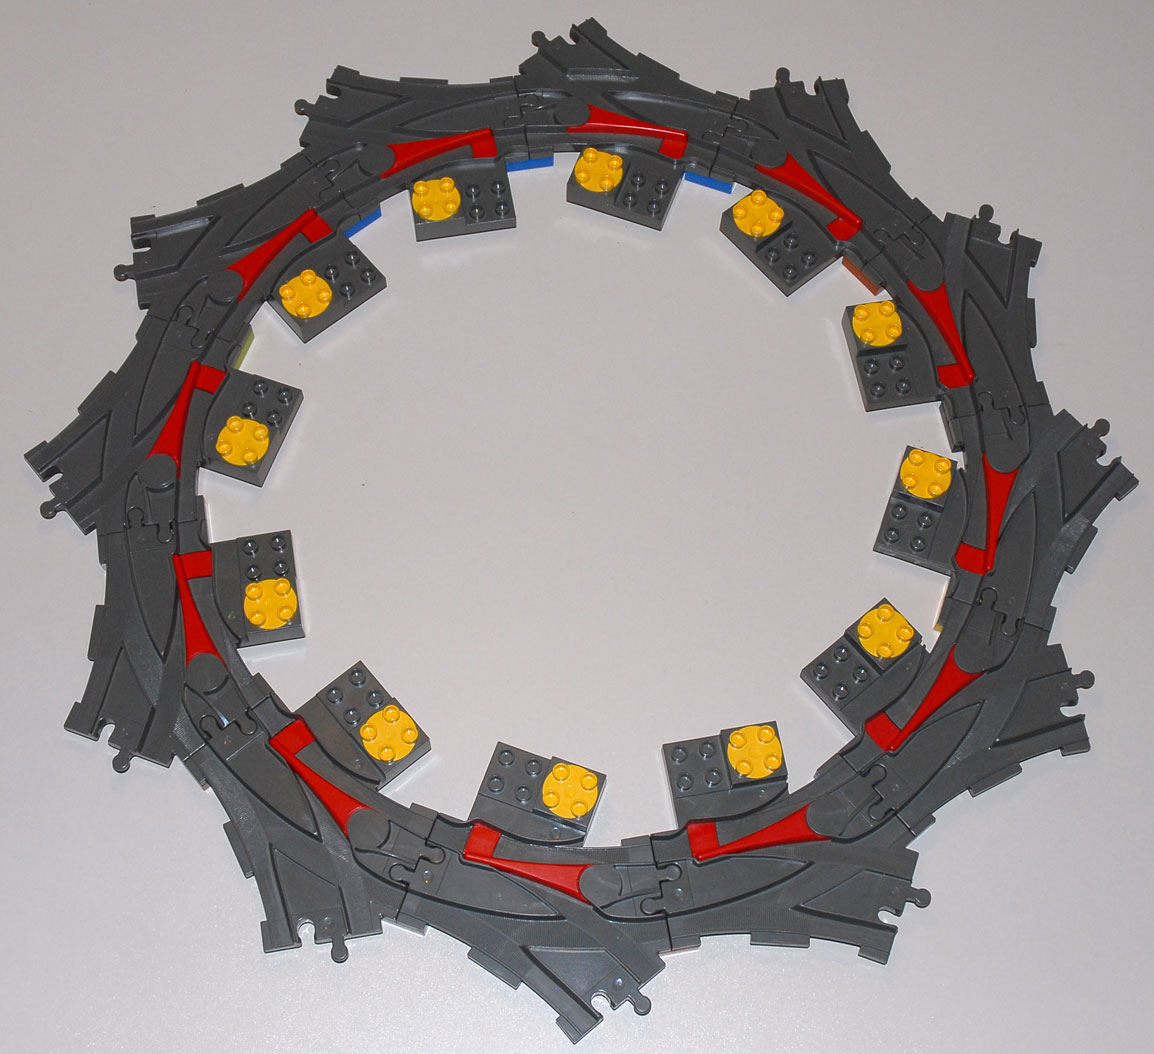
You can make a circle of old (or new) switches, and though it does not seem to be quite aligned to a Duplo grid, it does have an outer diameter of 36 Duplo knobs:
a circle made of (old) switchesa circle made of (old) switchesa circle made of (old) switches